Tyler Camera Systems Leader of Gyro Stabilizing Camera Mounts
  • Home
    • Nelson Tyler
  • Equipment
    • Minigyro
    • Minigyro-Set-Up and Safety Notes
    • Minigyro Vs Gyrobot
    • Nose
    • Super Nose
    • Major
    • Middle
    • Video Gimbal Framework >
      • Manuals & Product Information
    • (TSOP) Tyler Special Operations Platform >
      • Video
  • Dealers
    • United States Dealers
    • International Dealers
  • Pricing & Resources
    • Camera Mount Pricing
    • Rental Forms & Documents
    • Camera Operators / DP
    • Technicians
  • Photo / Video Gallery
    • Minigyro
    • Gyrobot
    • Nose
    • Super Nose
    • Major
    • Middle
    • Video
    • You Tube
  • Contact
  • Blog
Picture
Picture
Picture

Set up and Safety Notes
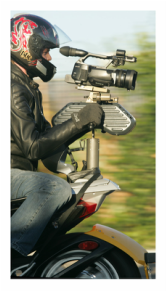
  1. Handle unit can fit onto Minigyro four different ways. Most common is with the hand grips pointing upwards, next to the camera itself, with handgrip lock knobs facing rearwards towards the operator.
  2. Make sure handle unit lock shaft is snug into dimple on handle unit (small knob).
  3. Make sure camera is tight to camera plate with proper allen screws.
  4. Make sure camera plate, with camera, is locked into receiver on mount and safety latch is in upwards position.
  5. Make sure Minigyro shock absorber unit "snaps" into bottom of Mount.
  6. If operating from aircraft or watercraft, be sure "Y" tether strap is attached to both Minigyro and shock absorber and then secured to vehicle hard point.

Minigyro Operation

The Minigyro Mount requires 3 pin 28 volts DC input right side receptacle. LED power indicator is on left side: Green correct voltage - Red low voltage.

IMPORTANT: The KS-8 "gyros" require 20 minutes spin-up time before use.

IMPORTANT: In extreme hot conditions turn Minigyro off between shots to prevent overheating.

SHOOTING NOTES: For best results do not grip handles to tight. Hold with a firm grip and let any vibrations pass through and onto the hands and arms, and not the mount. If possible, try not to have the mount touch the vehicle. Use the shock tube for extended shot time and heavier camera packages.

Panning too quickly will cause gyros to gimbal lock. You will feel a jolt if this happens. To prevent this adjust panning rate slower.  Remember you can also use the mount hand held for walking shots, similar to a Steadicam. If doing longer hand held shots, a sling or Easyrig over the shoulders can help with support of weight distribution. 

Tilt camera up or down on Mingyro as needed for comfort depending on angle towards subject. Use black lock arm on left side to lock the tilting unit in place. NOTE: Black lock arm can be d-tented to desired position by pulling arm out and twisting.
© 2015 All Rights Reserved, Tyler Camera Systyems, 14218 Aetna St., Van Nuys Ca. 91401
Contact